
The Zone System All values, from deepest black to perfect white, and all the greys in between, should be present in your negatives (if using film), computer files (if using digital) and prints.
With very few exceptions, all of the following tones should be present in your photographs. The tones do not have to be evenly represented, but each one should appear somewhere in your image.
One reason you want all of the tones is because the light greys give you detail in your highlights, and the dark greys
give you detail in your shadows.
"V" is equal to 18% grey, the tone that light meters use to determine the correct shutter speed and aperture f-stop combinations.
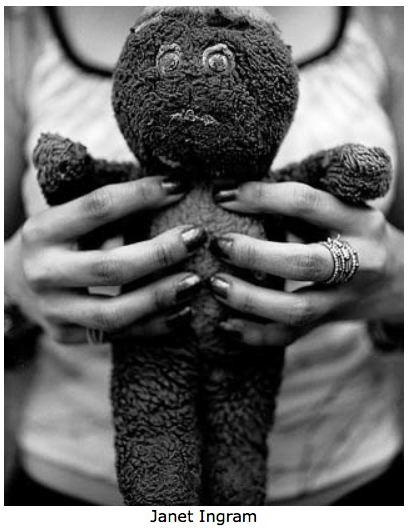
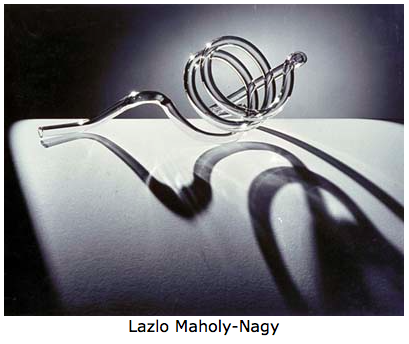
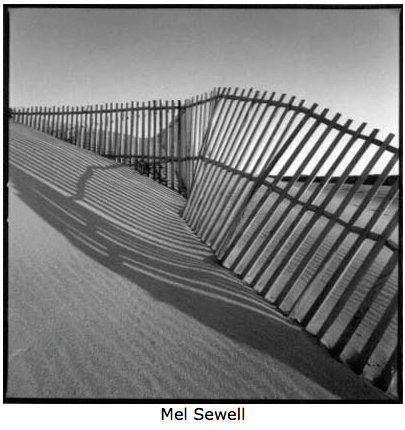
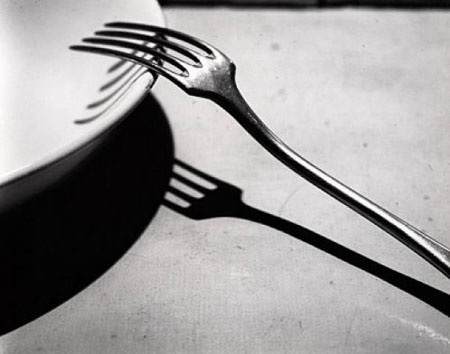
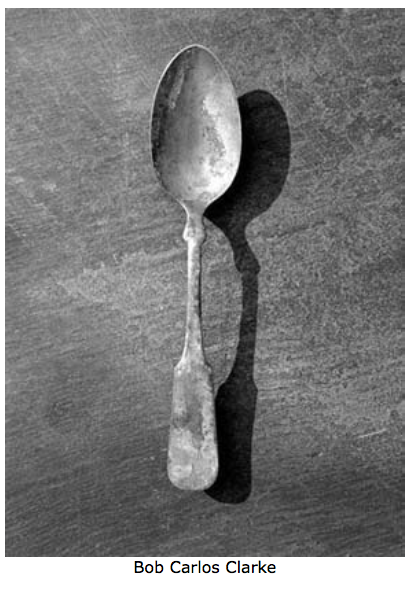
Examples: Here are some examples of photographs that contain the full range of values.
With very few exceptions, all of the following tones should be present in your photographs. The tones do not have to be evenly represented, but each one should appear somewhere in your image.
One reason you want all of the tones is because the light greys give you detail in your highlights, and the dark greys
give you detail in your shadows.
"V" is equal to 18% grey, the tone that light meters use to determine the correct shutter speed and aperture f-stop combinations.
Examples: Here are some examples of photographs that contain the full range of values.
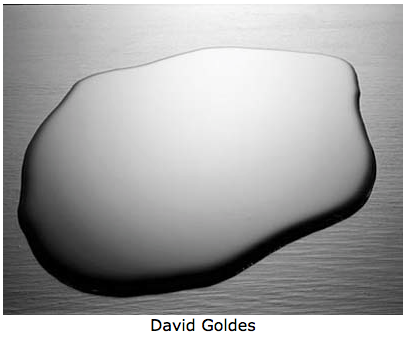
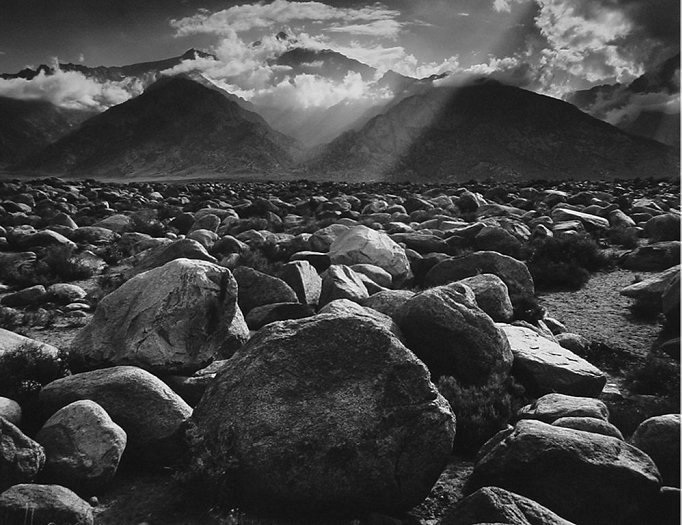
Ansel Adams
|

|
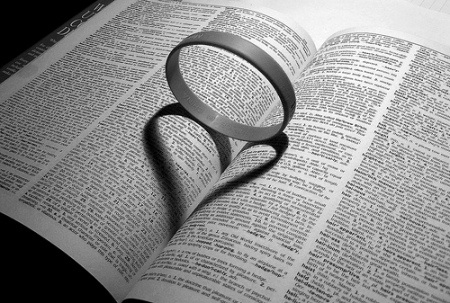
Your Value Assignment : Shadows as the Subject
Objectives:
Steps:
~~~You will need to bring objects from home that you think would create an interesting shadow.
~~~You will also need to have a light source to create different shadows. This can be a flashlight from home or your flashlight on your phone.
~~~One person will hold the light, the other will hold the camera. Remember, every student needs to turn in their own picture.
1. Think of ways to create an interesting composition with the object and the shadow the object creates. You may need to move around the object.
~~~Make choices to create visually strong compositions with camera angles and orientation.
2. The photo will need to be in black and white and you need to edit in photo shop to make sure the value in the picture looks good. (There should be a range of grays in the photo plus pure black and pure white).
Objectives:
- Learning to look at light and shadow in a new way
- Shooting digital photos to explore the ways in which light & shadow are important elements.
- Demonstrating that you can find a proper exposure.
- Demonstrating that you can turn a color image into a black & white image in Photoshop.
- Adjusting the LEVELS and CURVES of our images in Photoshop.
Steps:
~~~You will need to bring objects from home that you think would create an interesting shadow.
~~~You will also need to have a light source to create different shadows. This can be a flashlight from home or your flashlight on your phone.
~~~One person will hold the light, the other will hold the camera. Remember, every student needs to turn in their own picture.
1. Think of ways to create an interesting composition with the object and the shadow the object creates. You may need to move around the object.
~~~Make choices to create visually strong compositions with camera angles and orientation.
2. The photo will need to be in black and white and you need to edit in photo shop to make sure the value in the picture looks good. (There should be a range of grays in the photo plus pure black and pure white).
|
|

|
|
Editing:
1. Convert your photo to black and white and adjust the color sliders as needed.
2. Adjust Levels
--Hold down Alt as you slide the black and white sliders in towards the graph. Watch for "clipping" which means parts of the image will be lost, or completely white or black. You'll notice clipping when you see areas pop up while sliding.
See this site for more information: https://helpx.adobe.com/photoshop/using/levels-adjustment.html
3. Use other editing tools as needed: Crop, clone (on an image layer), sharpen, reduce noise, dodge, burn, etc.
Sharpening: http://tv.adobe.com/watch/learn-photoshop-cs6/sharpening-an-image-with-unsharp-mask
Noise Reduction: http://www.photoshopessentials.com/photo-editing/reduce-noise/
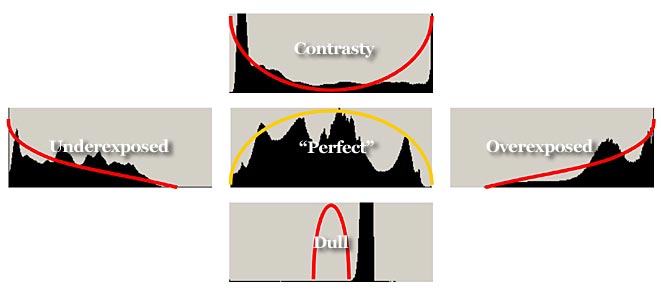
The Histogram
The histogram is a graph of the tones in your photograph. Shadows are on the left, Midtones are in the middle, and Highlights are on the right. Look at the histograms below to get a feel for what you should look for on your camera. Contrasty or "Perfect" are what we should be aiming for.
The histogram is a graph of the tones in your photograph. Shadows are on the left, Midtones are in the middle, and Highlights are on the right. Look at the histograms below to get a feel for what you should look for on your camera. Contrasty or "Perfect" are what we should be aiming for.
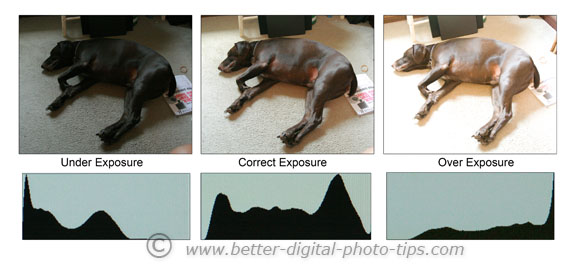
Exposure and Contrast:
The following link discusses how to properly expose photos. You want to have a range from light to dark. It shouldn't be over exposed or under exposed. See the link below for examples:
The following link discusses how to properly expose photos. You want to have a range from light to dark. It shouldn't be over exposed or under exposed. See the link below for examples:
Test Strips- Value and Tone:
The following link discusses how to expose correctly in relationship to value and tone
Note: usually test strips are used when developing a print in a dark room, but it still gives us a good idea of what to look for in our digital pictures.
The following link discusses how to expose correctly in relationship to value and tone
Note: usually test strips are used when developing a print in a dark room, but it still gives us a good idea of what to look for in our digital pictures.
